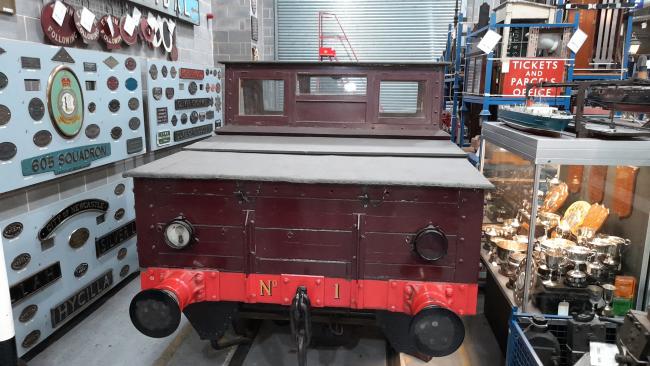
The North Staffs battery powered shunting loco is now preserved in the NRM in York. I felt that it would be appropriate to make a battery powered model of a battery powered prototype. The greater part of the loco is 3D printed, with a couple of N20 motors and wheel sets from Peter Korzelius (or you can print your own wagon size wheels).
Models
3D Model
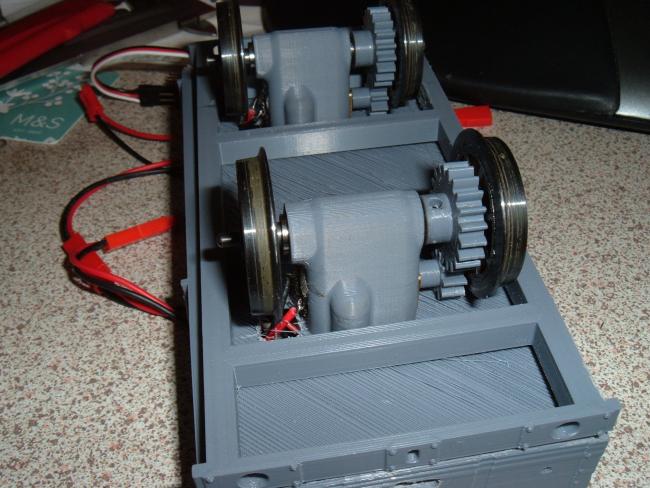
The 20 tooth gear (PLA) is mounted on the rotating axle. I found it to be a push fit onto PK axles. You may need a grub screw to retain it, or some adhesive.
3D Model
The motor mount will take an N20 motor. I used a 6volt, 300rpm unit but other voltage and speed ratios are available. You will also require two M3 threaded brass inserts, melted into the mount for securing to the floor of the vehicle. The axles (from Peter Korzelius wagon wheelsets) need two m5 x m8 x M3 ball races inserted into the shaft housing of the mount. A dab of adhesive helps to secure these in place. A spur gear drive gives a 2:1 reduction and can be created from the following files.
3D Model
STL file for the battery covers. This should clip in place on the top of the body and be removeable to gain access the the interior.
3D Model
Four off. These are the long buffer heads to be fixed inside the housing with adhesive instead of springing.
3D Model
Four off. These are the short version for springing. Tap the hole M2 x 0.4. Fit a spring from Peter Korzelius over an M2 screw, insert through the buffer housing into the threaded hole and tighten to leave about 3mm - 4mm movement. Glue onto the buffer beam so the screw can move freely through the hole.
3D Model
Four off. Fit to the buffer beam with the locating stud. The accompanying buffer head may be fixed or made to be sprung. On the museum prototype these were painted the same red as the buffer beams.
3D Model
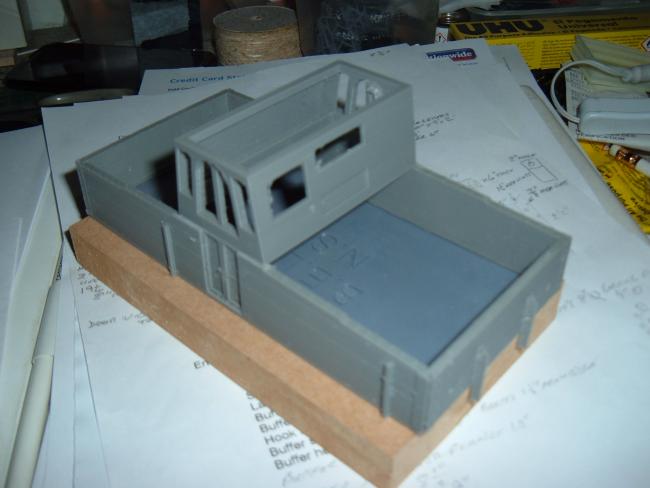
Cab roof for the NSR battery-electric loco. After painting the cab, insert the glazing. The door windows need to be inserted from below, all the others from the top. The cab can then be glued to the battery covers and the roof glued on top of the cab. The roof, cab and battery covers make a complete assembly that should clip onto the body.
3D Model
STL for the cab. Note the slots for the glazing material. The side glass for the door must be inserted from below before affixing to the top of the battery box covers.
3D Model
The handrails are rather vulnerable. They are best made using some flexible, resilient material and due to their fine detail are perhaps best made on a resin printer. Side of the body has holes to assist in positioning. You will require two of each 'hand'. I suggest you print some spares as well.
3D Model
There are two lamps at each end of the vehicle, one clear and the other with a red lens. A drop of appropriate paint inside, with a clear styrene lens should be adequate, or you can try to fit minute LEDs inside the body to shine through the positioning holes. When fixing these to the ends, I used a short length of filament through the holes to align them. Print four off plus a couple of spares.
3D Model
Two off. These are preferably made from resilient material to withstand handling. These are glued beneath the solebar, equally between the W-irons. For increased stability they can also be tacked beneath the axle boxes.
3D Model
STL file for the dummy sandboxes. These are mounted underneath the floor, just behind the buffer beam, one per wheel. Brass wire is inserted and bent to feed sand under the wheels.
3D Model
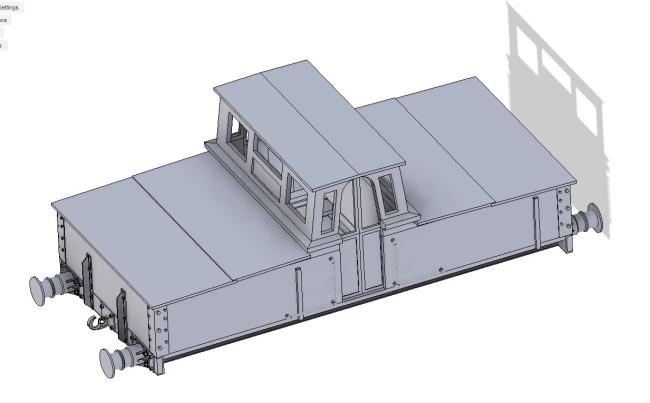
STL file for the complete underframe.
3D Model
STL file for the T-stanchions on the end panels. You need to print four of these (plus a couple of spares).
3D Model
STL file for the combined W-hanger, spring and axlebox and cover. The original prints were very fragile, so were strenthened by thickening the spring unit and adding a support structure behind the scroll of the box cover. You will need four of these. In use the axle boxes were in fact 'dummies' as the axles were carried by the gear boxes and shortened at the ends so do not come into contact with the boxes.
3D Model
STL file to construct the entire body of the loco - floor, sides and ends, as a single print. If there is sufficient demand, I will post the individual component files upon request.
3D Model
This gear wheel can be printed using PLA and is a push fit onto the motor axle. Note there is a flat on the axle to key with the gear shaft.


Reviews/Comments (subject to moderation)